Showing posts with label DIY. Show all posts

Sunday, March 11, 2012

A Very Hungry Caterpillar Birthday Party!


This past Saturday was the big day, Trey's 1st birthday party!  I was so excited for this! I have been planning it for several months now.  I decided to go with The Very Hungry Caterpillar theme because it quickly became one of Trey's favorite books.  He sits there through the whole thing and lets you read it to him.  This turned out to be such a FUN theme for a party, I am so glad I picked it!  So much to show you from the party, let's start with the invitation.......

I found this awesome seller on Etsy (Jen Leonardini at Top That! Designs) who will do custom designed invitations and party printables for VERY reasonable prices.  And her turn around time?  SO FAST!  I had all my stuff back in less than 24 hours!  If she doesn't have exactly what you want she will create it for you!  I highly recommend her for your next party! 

Now on to the decorations:
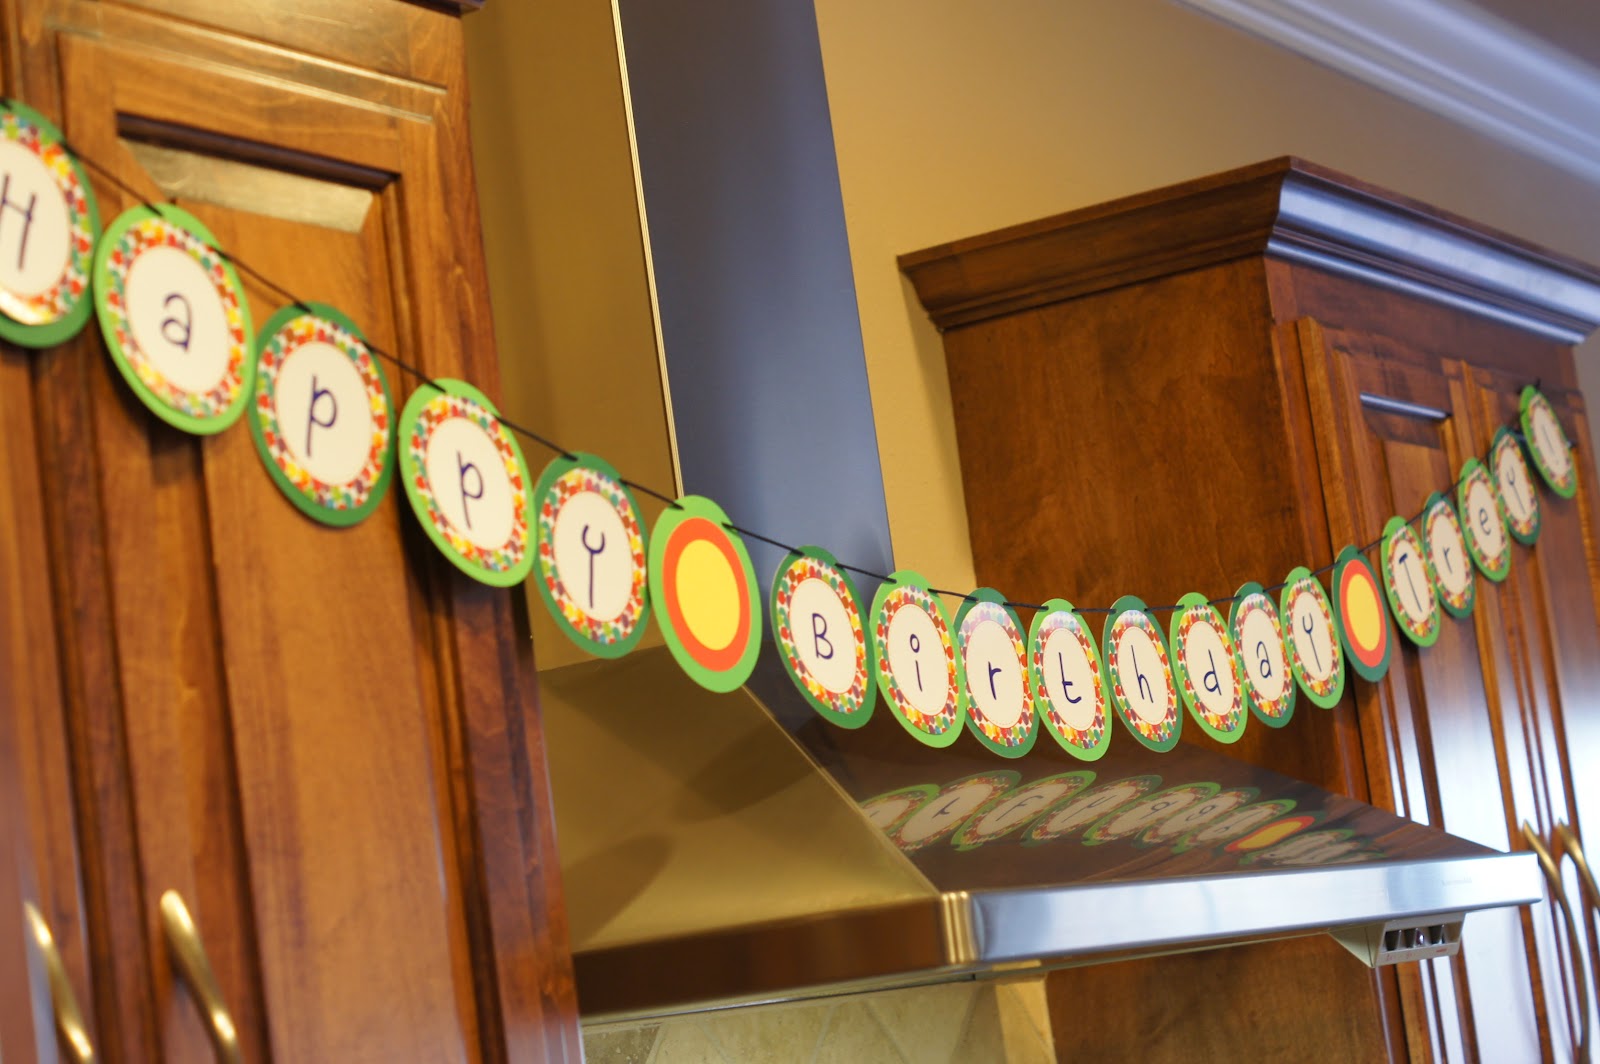
Coming up the driveway was a balloon path caterpillar (my idea). Inside we had a caterpillar made out of paper lanterns (idea from here), and a Happy Birthday Trey caterpillar banner (printable from Jen).


On the doorway was this super fun balloon wreath (idea and tutorial here), a photo wall of pictures of Trey from the last year, Hungry Caterpillar signs (printable from Jen), and a banner with Trey's monthly onesie photos.


I had Trey's cake smash picture printed as a 20x20 and then used Mod Podge to create this DIY canvas. Photo credits to Alicia, she is awesome!


Now the food!  Because the book is all about what foods he eats each day I decided to replicate that!  They made for perfect party munchies.  Monday through Friday was pretty straight forward.


On Saturday he ate TONS of fun food so I created the "Saturday" table.


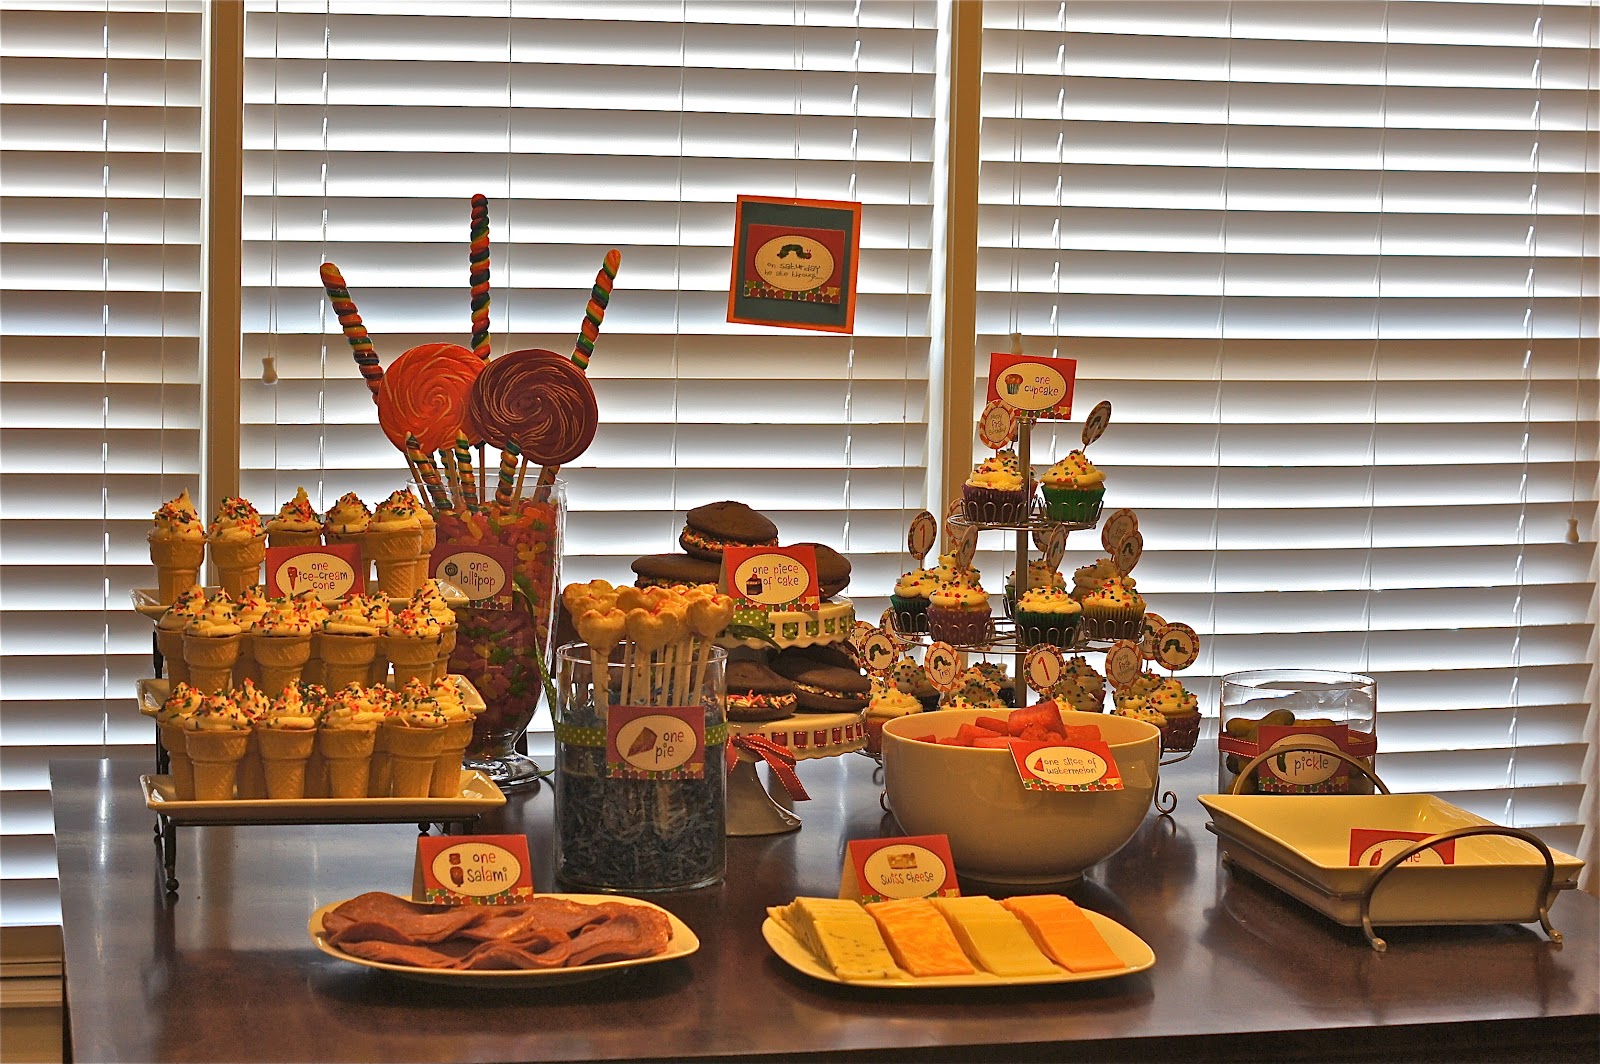
I've got to give a few of these some close up!

I didn't want to deal with cake cutting so I did chocolate whoopie pies instead!  They were yummy and easy to make.  Recipe here!

Since putting ice cream out wasn't very practical I needed to find a solution.  I have seen this all over Pinterest and decided they would be perfect!  There is not a specific recipe I used for this, just made chocolate and vanilla cupcakes, poured the mix into the cone (only about half way full), and baked them!

The cherry pie pops turned out so good!  This was my first attempt at this and definitely won't be my last!  Recipe here!

And then the cupcake tree!  With awesome personalized cupcake picks, once again from Jen!


What did we serve all this on?  Colorful plates of course!  I searched online for Hungry Caterpillar plates and napkins but could not find any, so I decided to tie into all the fun colors!  And, I wanted to make sure I got some of those fun paper straws.  They just look so cute!  I found this great site with reasonable prices and lots of fun stuff, Shop Sweet Lulu.

And finally, the give aways!  Little treat boxes with gummy worms for the kids, personalized Trey koozies for the adults, and water bottles for everyone!  All files for the printables again came from Jen!

Here is a picture of us with our birthday boy!  The shirt and hat (very first pic) were Etsy finds!

And here is some of the kiddos trying to figure out what the heck to do in the jump house!


Tuesday, January 31, 2012

Bear Down Arizona!


If you know me then you know I am a HUGE Arizona Wildcat fan.  And, so is my Mom and her side of the family.  Well as basketball season is in full swing I decided a Bear Down wreath was in order!  I do not have a typical front door so I don't ever get to showcase any wreaths.  Therefore, I decided to make one for Mom's door!  
If you want to make a wreath for yourself you can follow my tutorials here or here!

I think my favorite part of this one is the Bear Down sign, all glittery and pretty!  Simply take a piece of wood and use Mod Podge to put any kind of scrapbook paper onto it.  Then paint wooden letters in a matching color and hot glue gun them on.  I added a Wilbur the Wildcat sticker as well that I got from The University of Arizona bookstore!  Drill a small hole on each side of the sign and attach to the wreath using floral wire, just as you did for the poly mesh and the bulbs.
Oh and the basketballs are on "picks" so they can be removed and replaced with footballs when fall comes!  A dual season wreath!


Tuesday, December 20, 2011

Christmas Ornament Exchange

Every year we do a Christmas ornament exchange with some of our close friends.  I look forward to it every year!  We draw names several weeks in advance so we have time to pick out that perfect ornament.  I love trying to figure out just the right gift.  I also love seeing what ornament I get!  This year in our group of friends 4 of us all had our first kid so it has been the year of babies.  We went from a group of friends with no kids to a group of friends with 3 newborns!  It is going to be so much fun in the years to come as they grow up together.  Roy got Joey who is one of the few in the group that did not have a kid these year but he sure does love all of them!  He has quickly become known as Uncle Joey.  So when Roy pulled his name I knew exactly what I was going to make him.  Something with all the babies AND inspired by Pinterest of course!  I love how it turned out!  I am going to be making some more of these for sure!  I will probably only use 2 or 3 blocks on future ornaments.  But I needed 4 for each baby on this one.


Supplies:
Wood blocks (mine are 2x2)
Black paint (or whatever color you want)
Photos or words printed on photo paper (I found the photo paper to work better than normal paper)
Matte Mod Podge
Ribbons

Directions:
1.  Paint the blocks
2.  Drill a hole through the middle of each block
3.  Print pictures out (or words) in a 1.5x1.5 square
4.  Paint a layer of Mod Podge onto the block
5.  Put picture on top of the wet Mod Podge and paint another layer on top of the picture
6.  Let the first layer dry and do one more layer, be careful not to paint it too thick
7.  Once the blocks are dry string your ribbon through the holes tying a knot in-between each block
8.  Add as much ribbon as you want to the top and bottoms of the blocks

A couple of different views of the ornament....


Original idea from Craft Goodies

Saturday, December 3, 2011

Grapevine Poly Mesh Wreath - How To Make It!


I decided I loved the poly mesh wreaths I made several weeks ago (this post) so much that I was going to do a couple as gifts for some friends.  But this time I decided to use a grapevine wreath and change a few things up a bit.  Also added some personalization with the letter of their last name.  I absolutely LOVE how these came out!  And of course I am going to give the tutorial on how to make them because as mentioned in my previous "how to" post, I cannot get over how much people are getting away with charging for these!  So simple to make, I promise!


Supplies:
21" wide roll of deco mesh
Floral wire
Ribbon in a coordinating color (any size will work just depends on the effect you want)
24" wreath (or any other size you want - I just think this is a good standard size)
Wooden letter
Paints for your letter
Hot glue gun
Any decorations you want to add

Note: All supplies can be found at Hobby Lobby or whatever your local craft store is.  I do like the deco mesh options found at Mardi Gras Outlet.  They have a lot of different stuff to choose from. 


1.  Start by painting your letter in any design or color theme you wish.  Let it dry while you work on the rest of the wreath.  Tip: Using the eraser of a pencil works quite well to make good dots.
 

2.  Hot glue the end of your ribbon to the grapevine wreath.

3.  Wrap the ribbon around the wreath.  You can make it closer together if you don't want to see the wreath form you are using.  I really liked the grapevine so I wrapped mine pretty wide.  Once you reach the starting point of your ribbon cut it off from the roll and glue the end in the same spot you glued the first piece.

4.  Wrap the floral wire around the wreath and twist a couple times to secure.  It is hard to see but it is in the middle of the picture.  It's green.  Place them sporadically around the wreath to create the spots where you will "gather" your poly mesh.

5.  Take your poly mesh and make bunches around the wreath where you placed the floral wire.  You can follow the steps in my previous how to (here) to find out how exactly to work with the poly mesh.

6.  Arrange your decorations around the wreath where you want them.  A lot of these I was able to stick the picks on the end of the decorations into the grapevine to secure and did not need the hot glue gun.  You will need to hot glue the letter onto the wreath.  To attach the ornaments I just used the floral wire that was left over from securing the poly mesh.  You can make your wreath as simple or as full of stuff as you like!  I think mine falls in between those two.

All Done!  See how simple that was?

Saturday, November 19, 2011

Poly Mesh Wreath How To


I see these wreaths for sale all over the Internet and in stores for ridiculous prices.  I can't believe people are charging $150 and more for these!  They are so simple to make, here is how:

Supplies:
21" wide roll of deco mesh
Deco flex tubing
Ribbon in a coordinating color (any size will work just depends on the effect you want)
Any decorations you want to add
24" wreath
Note: I like the wreath forms found at Mardi Gras Outlet with the wires already attached.  Saves you from cutting individual wires to wrap around a normal wreath.  They have great prices too!

1.  Begin by placing the end of the 21" poly mesh into one of the wires on the inner circle of the wreath form.  Twist the wire once to secure.

2.  Gather some of the poly mesh and "poof" to form your first bump.  The more fullness you want to your wreath the more poly mesh you will want.  Use the next set of wires on the inner circle of the wreath to secure down the poly mesh.  Twist once to secure.  For this particular wreath I did not want it very poofy so I only gathered about 3 inches.  For the red and white wreath at the very top of this blog it is a bit more full, I gathered about 6 inches of poly mesh for each of those poofs.

3.  Continue this process around the entire inner circle.  Try to keep your poofs as even as possible.  Once you reach the end cut the poly mesh off from the roll.  Secure the end into the original tie you started on.  And the inner circle is done!

4.  Now follow the same process around the outer circle of ties.  You will want to make these poofs a little bigger than the inside poofs.  Add a couple more inches to each bunch you gather on the outer circle.

4.  Once you make it all the way around secure down the end just as you did on the inner circle and you are finished with the poly mesh portion.

5.  Now add in the coordinating ribbon by securing it down in the twist ties.  


6.  Work your way around the entire wreath until you have made it to all of the ties.

7.  To add in the deco flex tubing make a loop with the first section of the string and secure into one of the twist ties.

8.  Work your way around the wreath by making loops in the tubing at each twist tie and securing.  In order to hide the deco flex tubing as you go from twist tie to twist tie go underneath the poofs which will ensure the extra tubing is not seen on the final wreath.  

9.  Work your way around the wreath until you have the deco flex tubing everywhere that you want it. For this wreath I did the deco flex tubing on both the outer and inner ring of ties.  In the red and white wreath I only did the tubing on the outer ring of ties. 

10.  Add any decorations to the wreath that you want.  I like the more simple wreaths with only a few decorations.  But there are also plenty of gorgeous wreaths that have tons of ornaments and such added on, so go crazy if you wish!

Hopefully this tutorial will save you some money from having to spend so much on the wreaths people sell!  I can't tell you how easy this was.  And quick to do!  This took me about 30 minutes per wreath.  I got both the red and white and green and white wreath done while Trey was napping.

Update:  Here is another tutorial I did for a different style of poly mesh wreath.  Click here