Showing posts with label Dessert Recipes. Show all posts

Sunday, March 10, 2013

Trey's Curious George 2nd Birthday Party!

First of all, let me just say that I cannot believe my little baby boy is 2!  He is definitely not a baby anymore and well into the toddler stage.  He has such a fun personality that I just love seeing everyday!


When deciding on a party theme I went through several options and ultimately landed on Curious George!  Trey enjoys all his Curious George books and especially likes The Man in the Yellow Hat.  I figure I only have a couple more years of being the one who gets to pick the theme before Trey starts insisting on super heroes, sports, or something else.


I again used Jen Leonardini at Top That! Designs for the part printables.  I couldn't find exactly what I wanted on Etsy so I emailed her several things I liked and she combined all the good aspects into one design.  I am telling you, this lady is good!

I kept it pretty simple with the decorations.  Thank you to Pinterest for some inspiration with the doorway decorations.  They were simply cheap plastic table cloths pinned up in the archway with some balloons on each side and a sign made by Jen in the middle!  Jen also made the printables for the Happy Birthday banner over the fireplace.  I think one of my favorites was the Curious George stuffed animal hanging on to some helium filled balloons!  You can see it a little better in the food table shot.


We also had a coloring table to keep the kids occupied for awhile.  I found this great site with printable coloring pages for just about any cartoon character!  Click here for the site.


Ok, now on to the food!  I tried to keep it somewhat themed to the overall party either by using banana flavor, monkey named, or fitting in with the color scheme of red, yellow, and brown.


Here are some close ups of the specific party themed foods....

Chocolate banana pops - recipe here

Red caramel crunch popcorn made by seriouscupcakes.com

Monkey tail sandwiches

Taffy skewers with red, yellow, brown taffy

Banana pudding parfaits - recipe here

Banana peanut butter chocolate chip cookies - recipe here


And then THE CAKE!  I slacked off this year and paid to have someone make the cake.  I am 7 months preggo, I needed some slacking, haha!  However, it turned out AMAZING!  So much better than anything I could have done and it was a great centerpiece for the food table.  This lady is local to our area and works from home, no store front.  I highly recommend her to anyone in the NWA area!  The middle was a chocolate chip banana flavored cake, it was yummy!

Trey loved it too!  Can you see his excitement?

Blowing out the candles

Trey had a great time at his party and thank you to everyone who came!  Below are some highlights from the present opening and guest attendance!


Sunday, March 11, 2012

A Very Hungry Caterpillar Birthday Party!


This past Saturday was the big day, Trey's 1st birthday party!  I was so excited for this! I have been planning it for several months now.  I decided to go with The Very Hungry Caterpillar theme because it quickly became one of Trey's favorite books.  He sits there through the whole thing and lets you read it to him.  This turned out to be such a FUN theme for a party, I am so glad I picked it!  So much to show you from the party, let's start with the invitation.......

I found this awesome seller on Etsy (Jen Leonardini at Top That! Designs) who will do custom designed invitations and party printables for VERY reasonable prices.  And her turn around time?  SO FAST!  I had all my stuff back in less than 24 hours!  If she doesn't have exactly what you want she will create it for you!  I highly recommend her for your next party! 

Now on to the decorations:
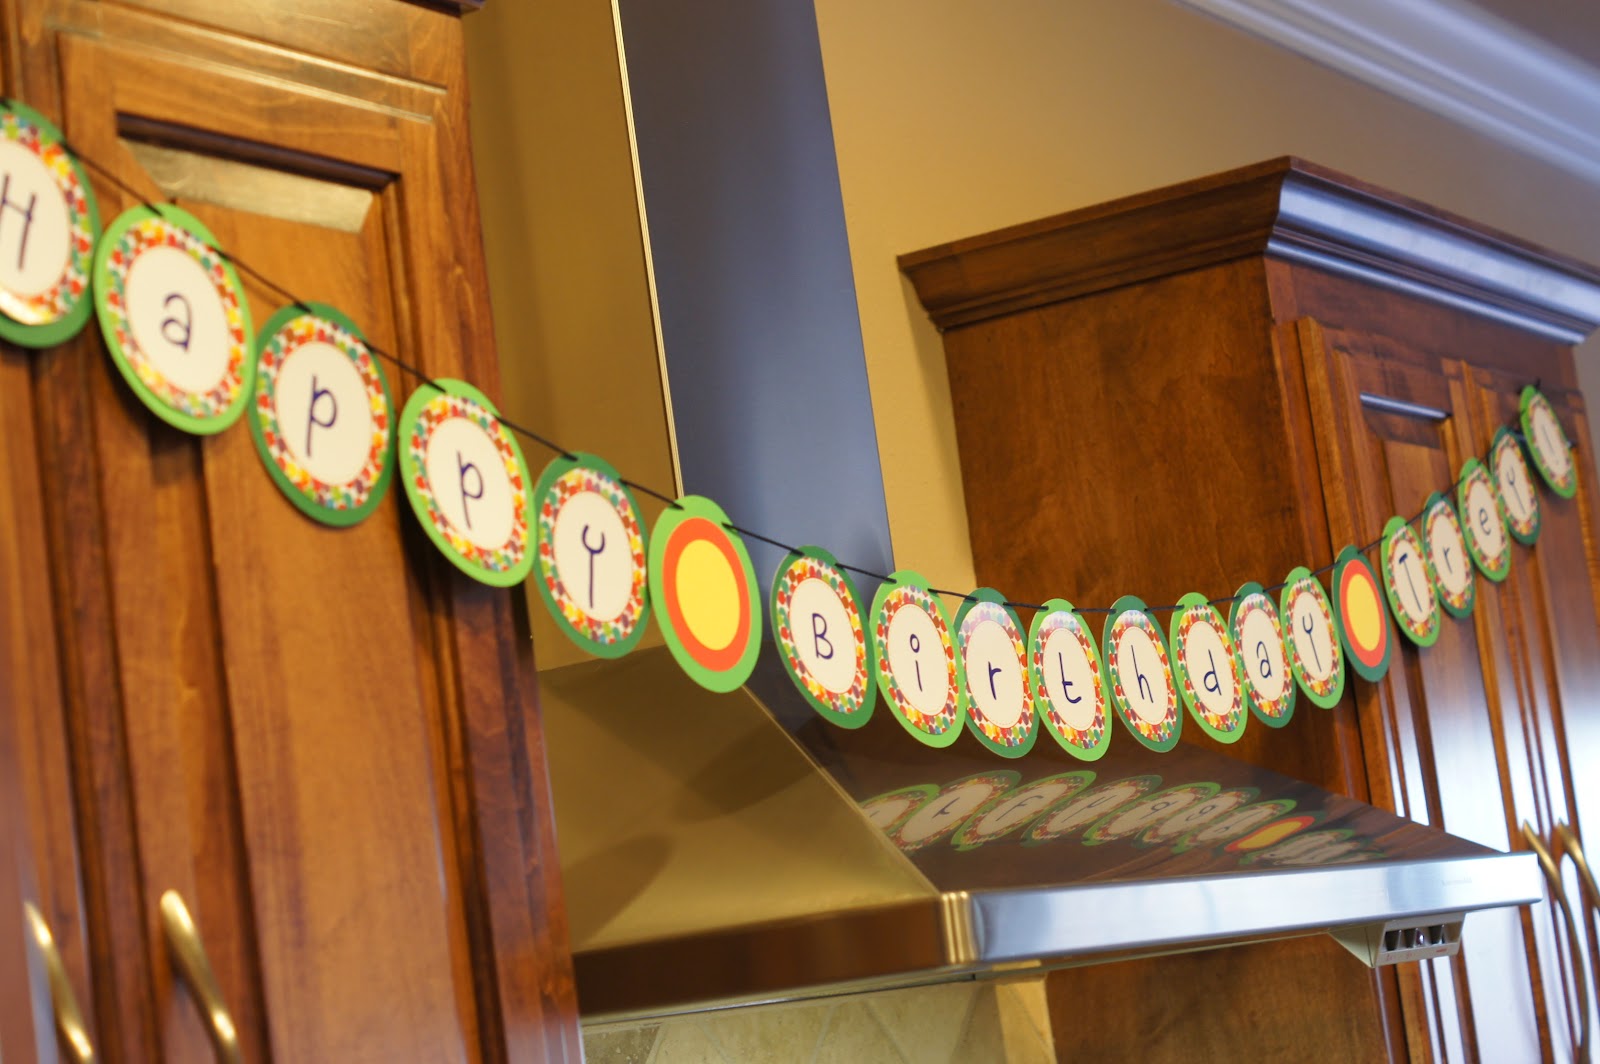
Coming up the driveway was a balloon path caterpillar (my idea). Inside we had a caterpillar made out of paper lanterns (idea from here), and a Happy Birthday Trey caterpillar banner (printable from Jen).


On the doorway was this super fun balloon wreath (idea and tutorial here), a photo wall of pictures of Trey from the last year, Hungry Caterpillar signs (printable from Jen), and a banner with Trey's monthly onesie photos.


I had Trey's cake smash picture printed as a 20x20 and then used Mod Podge to create this DIY canvas. Photo credits to Alicia, she is awesome!


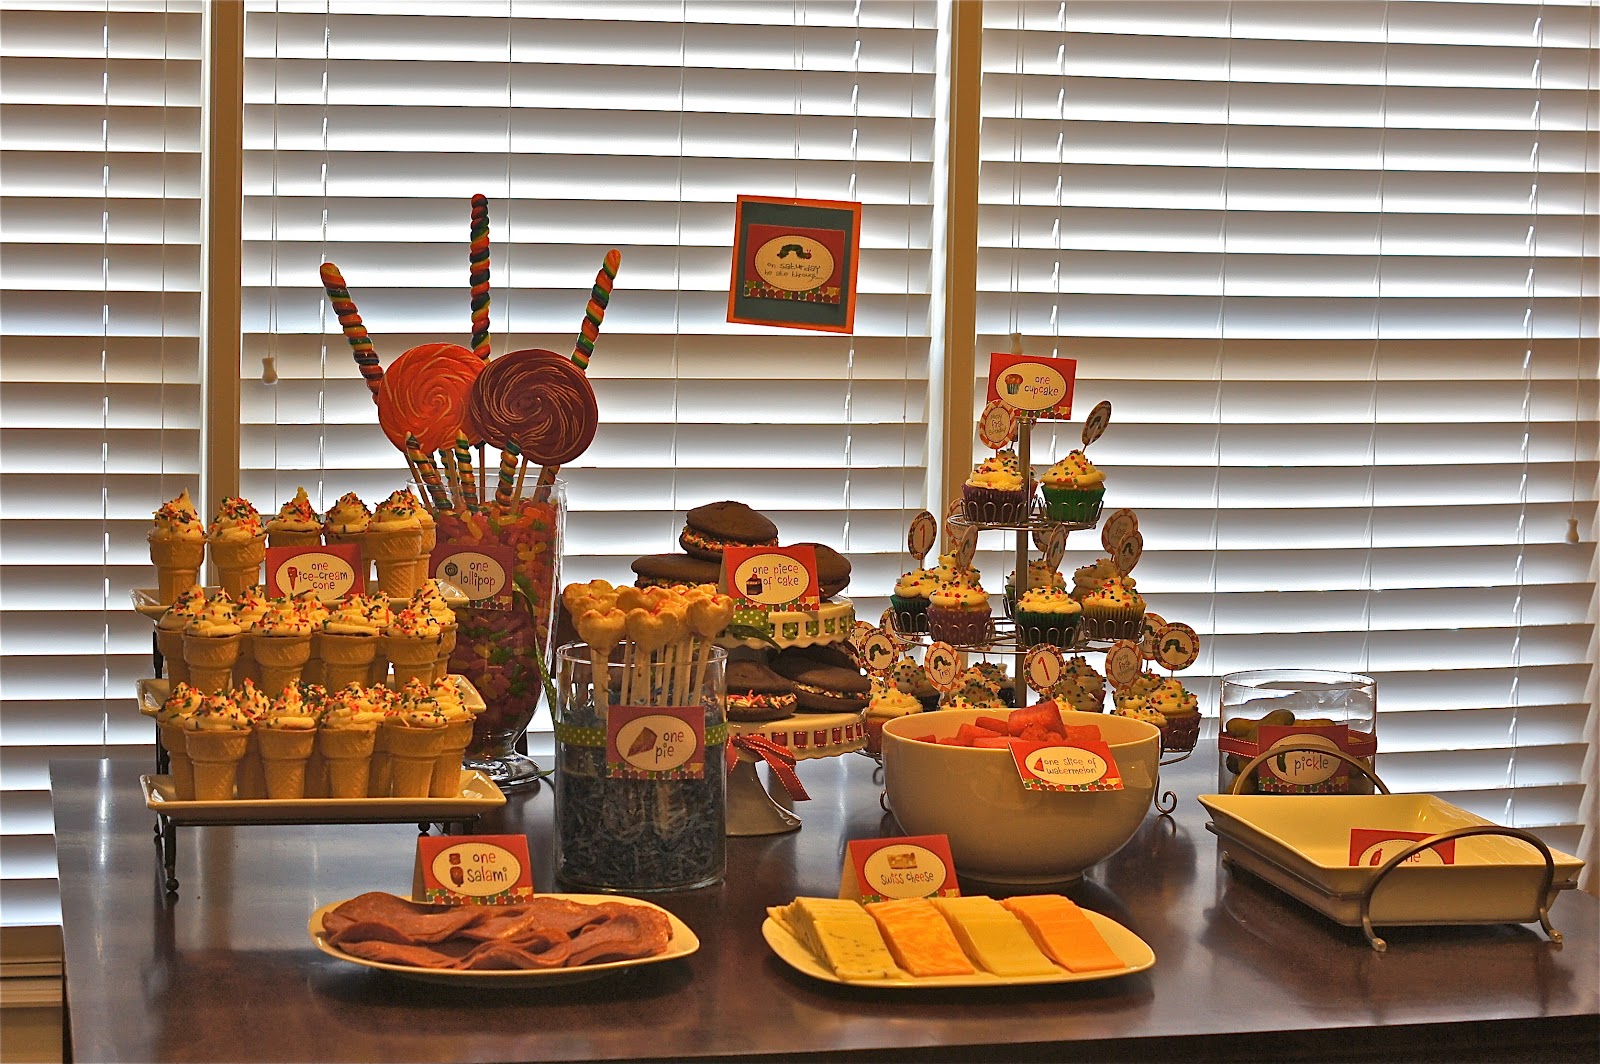
Now the food!  Because the book is all about what foods he eats each day I decided to replicate that!  They made for perfect party munchies.  Monday through Friday was pretty straight forward.


On Saturday he ate TONS of fun food so I created the "Saturday" table.


I've got to give a few of these some close up!

I didn't want to deal with cake cutting so I did chocolate whoopie pies instead!  They were yummy and easy to make.  Recipe here!

Since putting ice cream out wasn't very practical I needed to find a solution.  I have seen this all over Pinterest and decided they would be perfect!  There is not a specific recipe I used for this, just made chocolate and vanilla cupcakes, poured the mix into the cone (only about half way full), and baked them!

The cherry pie pops turned out so good!  This was my first attempt at this and definitely won't be my last!  Recipe here!

And then the cupcake tree!  With awesome personalized cupcake picks, once again from Jen!


What did we serve all this on?  Colorful plates of course!  I searched online for Hungry Caterpillar plates and napkins but could not find any, so I decided to tie into all the fun colors!  And, I wanted to make sure I got some of those fun paper straws.  They just look so cute!  I found this great site with reasonable prices and lots of fun stuff, Shop Sweet Lulu.

And finally, the give aways!  Little treat boxes with gummy worms for the kids, personalized Trey koozies for the adults, and water bottles for everyone!  All files for the printables again came from Jen!

Here is a picture of us with our birthday boy!  The shirt and hat (very first pic) were Etsy finds!

And here is some of the kiddos trying to figure out what the heck to do in the jump house!


Saturday, March 3, 2012

Happy March!

It's been awhile since I've posted.  I've been busy getting things ready for Trey's 1st birthday party next weekend!  More to come on that later.  For now though, I thought I would share some St. Patrick's Day Cake Balls!


I love making cake balls, they are so easy and look so great!  These were chocolate cake, cream cheese frosting, and white Almond Bark coating.  Go here for the how to!

Sunday, February 12, 2012

Valentine's Day Cookie Bars


Holiday food day at work only means one thing, time to bake!


Valentine's Day Brown Sugar Blondies
makes a 9x9 pan
*Double the recipe if you would like to make it in a 9x13 pan.*
  • 1 c. flour
  • 1/2 tsp. baking powder
  • 1/8 tsp. baking soda
  • 1/2 tsp. salt
  • 1/3 c. butter
  • 1 c. brown sugar, packed
  • 1 egg, beaten
  • 1 Tbsp vanilla extract
  • 1 - 1 1/2 c. Valentine's Day M&M's
Directions
  1. Mix together flour, baking powder, baking soda, and salt. Set aside.
  2. Melt 1/3 c. butter. Place it in a mixing bowl then add 1 cup firmly packed brown sugar; mix well and cool slightly. Add egg and vanilla and blend well.
  3. Add the flour mixture a little at a time, mixing well. Mix in about 2/3 c. of the M&M's.
  4. Spread in a greased 9x9 pan. Sprinkle more M&M's on top (about 2/3 c. more, or desired amount).
  5. Bake 20 to 25 minutes at 350 degrees. 
Recipe from Cupcake Diaries

And of course, here is the picture of the fearless foursome all decked out for the holiday!  Love these kids!  Brynn's Daddy took the picture, great work Anthony!


Sunday, February 5, 2012

Super Bowl Sunday!

One of my favorite days of the year!  What's not to love about it?  Great football (usually), good friends, beverages, and yummy snacks!  And on that note of yummy snacks I bring you chocolate peanut butter cookies!  These puppies are delicious!  Chocolate and peanut butter might very well be one of my favorite combinations of all time and this cookie marries them together perfectly!


I found this delicious recipe on one of my go to blogs for yummy desserts, Annie's Eats!

And here is a picture of Trey ready for the big game to begin!  Happy Super Bowl Sunday everyone!

Sunday, January 29, 2012

Biscoff Cookie Spread Cupcakes


I know what you're probably thinking, what in the heck?  You know those yummy little shortbread like cookies you get on the airplane sometimes?  They look like this......

Well now there is a spread made out of them!  Just like peanut butter but it taste like these yummy little cookies.  And it comes in creamy or crunchy.  The crunchy is my personal favorite because it has crumbled up pieces of cookies in it, yum!  Found in the peanut butter section of your local Walmart ;)

Well everyone at work was excited about this new spread and so I decided it would be a perfect filling for a cupcake.  Kind of like a peanut butter and chocolate cupcake, you know?  My dilemma though was the frosting.  The spread is very sweet and I knew these would be super rich cupcakes and I didn't want to overdo it with an equally sweet frosting.  So I decided to do a simple chocolate ganache topping.  And I must say, these puppies are quite the tasty treat!  I used a boxed mix this time (shhhh, don't tell) to keep things simple.  But, any chocolate cake recipe would work.

Ingredients:
1 box chocolate cake mix and ingredients it calls for on box
2 jars Biscoff Spread
4 ounces finely chopped semi-sweet Baker's chocolate
1/2 cup plus 1 tablespoon heavy whipping cream
2 tablespoons butter at room temperature cut into slices

Directions:
1.  Make cupcakes according to package directions.
2.  Once the cupcakes are cooled use a paring knife to cut a circle out of the middle of the cupcake.  Be careful not to go all the way to the bottom of the cupcake.
3.  Spoon the Biscoff spread into the cupcake and smooth off the top.

4.  Finely chop the 4 ounces of Baker's chocolate and place into a small bowl.  It will be easy to top the cupcakes if you use a small bowl because the ganache topping will be deeper in a small bowl.
5.  Heat the heavy whipping cream on the stove until it starts boiling.  
6.  Pour half of the cream into the bowl with chocolate and let sit for 30 seconds.
7.  Whisk the chocolate until uses small circles to stir.  Once it is smooth and combined add in the remaining cream and continue to whisk until combined.
8.  Add in the butter one slice at a time slowly whisking until just combined.  You do not want to over stir, it will cause your ganache to not be as shiny.
9.  Dip the tops of your cupcake into the ganache.
10.  Put finished cupcakes into the fridge to allow the ganache to set.
11.  Serve at room temperature.


Sunday, January 22, 2012

Cappuccino Fudge Cheesecake

So, as I have mentioned before, I got a little behind on posting.  This wonderfully delicious dessert was from my Mom's birthday back in December.  Only a month late!  This one was yummy, coffee flavor, chocolate, and cheesecake.  How can you go wrong?


Cappuccino Fudge Cheesecake
Printer-Friendly Version

Ingredients:
For the crust:
32 chocolate sandwich cookies, finely processed into crumbs
5 1/3 tbsp. unsalted butter, melted and cooled
Small pinch of salt
For the ganache:
1½ cups heavy cream
20 oz. bittersweet or semisweet chocolate, finely chopped
¼ cup coffee flavored liqueur
For the filling:
3 (8 oz.) packages cream cheese, at room temperature
1 cup sugar
1½ tbsp. all-purpose flour
1½ tbsp. dark rum
2 tbsp. instant espresso powder
2 tsp. vanilla extract
1½ tsp. mild-flavored (light) molasses
3 large eggs
For the topping:
1½ cups sour cream
1/3 cup sugar
2 tsp. vanilla extract


Directions:
To make the crust, butter a 9-inch springform pan and place it on a baking sheet.  Combine the chocolate cookie crumbs, melted butter and salt in a small bowl.  Toss with a fork to moisten all of the crumbs.  Press into a thin layer covering the bottom and sides of the springform pan (at least 3 inches up the sides).
Bring the cream to a simmer in a medium saucepan.  Place the chocolate in a medium bowl.  Once the cream reaches a simmer, pour the cream over the chocolate and let stand 1-2 minutes.  Add the coffee flavored liqueur and whisk in small circles until a smooth ganache has formed.  Pour 2 cups of the ganache over the bottom of the crust.  Freeze until the ganache layer is firm, about 30 minutes.  Reserve the remaining ganache; cover and let stand at room temperature for later decorating.
Preheat the oven to 350˚ F and position a rack in the middle of the oven.  In the bowl of an electric mixer fitted with the paddle attachment, beat the cream cheese and sugar on medium-high speed until well blended.  Beat in the flour.  In a small bowl, combine the rum, espresso powder, vanilla and molasses, stirring until the espresso powder dissolves.  Add to the cream cheese mixture and beat until well incorporated, scraping down the sides of the bowl as needed.  Beat in the eggs one at a time, scraping down the bowl between each addition.
Pour the filling over the cold ganache in the crust.  Place the springform pan on a rimmed baking sheet.  Bake until the top is lightly browned, puffed and cracked at the edges, and the center moves only very slightly when the pan is lightly shaken, about 1 hour.  Transfer to a wire cooling rack.  Cool 15 minutes while preparing the topping (maintaining the oven temperature.)
To make the topping, whisk together the sour cream, sugar and vanilla in a small bowl.  Pour the topping over the hot cheesecake, spreading to cover the filling completely.  Bake until the topping is set, about 10-15 minutes.  Return to the cooling rack and let cool at room temperature for at least 30 minutes.  Transfer to the refrigerator and let cool at least 3 hours, until completely chilled and set.
To finish, wrap a warm towel around the outside of the springform pan to help loosen the crust from the sides.  Carefully remove the springform.  Transfer the cake to a serving platter.  Place the reserved ganache in a pastry bag fitted with a decorative tip and use to garnish the top of the cake as desired.  Garnish with chocolate-covered espresso beans as desired.  Chill until the ganache is completely firm, at least 6 hours.

Source: Annie's Eats

Saturday, January 7, 2012

Happy New Year!


Ok, so I am a little behind with my posting.  The holidays were crazy and I didn't have time to put updates on here from all the events.  I will start with the New Year's Eve cake balls I made.  I decided to do strawberry cake with strawberry icing.  Then I dipped it in this confetti looking Candy Melts that I found.  Then used black gel writing to put '2012' on with.  You can find the recipe here.

We went over to our friends house to hang out with the usual cast of characters.  We of course had matching outfits for the kids and had to take a picture of the 4 babies in their outfits.  Born in 2011 is what the onesies say, it's a little hard to tell!


2011 was quite the year for our family.  Here is a brief recap of some of the significant events this year:
- We welcomed our first kid into this world on March 5th who has turned out to be the sweetest little boy ever!
- Took a cross country voyage to Arizona with Trey when he was 3 months old to visit family, see my little sister graduate high school, and have Trey baptized.
- My Mom moved to Arkansas to be Trey's babysitter during the day!  Leaving the town and house I was sure she would end up in forever.
- Trey had his first plane ride at 6 months old to see Roy's littlest brother get married!
- We met up with Tata and Nana in Pittsburgh to celebrate Roy's Dad turning 50 and watch his beloved Steelers beat the Seahawks!
- Roy and I both turned 30, ugh!
- Mom found out she had colon cancer 2 days before Christmas, had surgery on Christmas Eve, was sent home a few days later with a clean bill of health!
- My Dad drove out to Arkansas to stay with us and take care of Trey during the day while my Mom recovers.  I think he was just looking for an excuses for some quality Grandpa/Trey time ;)
- We rung in the New Year with some of the best of friends anyone could ask for!

Here's to having a GREAT 2012!  And wishing you all the same!

Thursday, December 22, 2011

Dark Chocolate Peppermint Cake


For the annual Christmas ornament exchange with our close group of friends I decided to make a dark chocolate peppermint cake.  It turned out quite yummy!  But before the recipe, a picture of the gang at the exchange!

And the babies in their matching elf outfits!  It is quite hilarious to watch the craziness that goes on while trying to get them all to sit up right, pay attention, smile, etc., etc.

Ok, onto the recipe:

Chocolate Cake Layers
From Chocolate & Carrots
Ingredients
  • 1/3 cups dark chocolate chips such as Ghirardelli
  • 1 1/2 cups hot brewed coffee
  • 3 cups sugar
  • 2 1/2 cups unbleached all-purpose flour
  • 1 1/2 cups Hershey’s special dark cocoa powder
  • 2 teaspoons baking soda
  • 3/4 teaspoon baking powder
  • 1/8 teaspoons salt
  • 3 large eggs
  • 3/4 cup vegetable oil
  • 1 1/2 cups well-shaken low fat buttermilk
  • 1 teaspoon vanilla extract
How-To
  1. Preheat oven to 300°.
  2. Grease and lightly flour 3 9″ cake pans.
  3. In a medium sized bowl, pour the hot coffee over the chocolate chips. Let it stand for a couple of minutes, and stir until chocolate is melted.
  4. Into a large bowl sift together sugar, flour, cocoa powder, baking soda, baking powder, and salt.
  5. In the bowl of your electric mixer beat eggs until thickened slightly and lemon colored (about 3 minutes with a standing mixer or 5 minutes with a hand-held mixer).
  6. Slowly add the oil, buttermilk, vanilla, and melted chocolate mixture to the eggs, beating until combined.
  7. Add the dry ingredients mixture and beat on medium speed until just combined.
  8. Divide the batter evenly between the cake pans
  9. Bake on the middle racks of the oven until a tester inserted in center comes out clean, about an 1 hour to 1 hour and 10 minutes.
  10. Cool layers completely in pans on racks.
  11. Once completely cooled, invert the cake layers onto individual long sheets of plastic wrap. Be sure to wrap each layer tightly.
  12. Freeze the layers for about 3-4 hours (up to 24 hours).


Peppermint Frosting


Ingredients
  • 3 cups sifted powdered sugar
  • 1/4 cup unsalted butter at room temperature
  • 3 oz cream cheese at room temperature
  • 6-8 tsp milk
  • 1/2 cup crushed peppermint candy
How-To

  1. Cream butter and cream cheese with an electric mixer
  2. Add powdered sugar 1 cup at a time
  3. Incorporate milk as needed until you reach the desired consistency
  4. Add peppermint candy
  5. Frost cake and place in fridge to set

Chocolate Trees


Ingredients
  • 12 ounces dark chocolate chips
How-To
  1. Over a double boiler, melt the chocolate.
  2. Remove from the double boiler and let the chocolate get lukewarm (it should be soft enough to drip/lightly squeeze out of a piping bag but not so hard that you have to use a lot of pressure to get it out of the bag)
  3. Lay out a couple layers of foil on a flat surface (or even better, on flat cookie sheets).
  4. Draw out your trees with the melted chocolate.
  5. Put the chocolate trees in the fridge until they are hard.
  6. Using gloves (so you don’t melt the trees with your hands or get finger prints on them), squirt some chocolate on the backs of your trees and place them on the cake.


Saturday, December 17, 2011

Macarons are the new cupcake!


Well not really, but they sure are becoming a craze.  Macaron shops are starting to pop up like cupcake shops did several years ago.  I thought I would give them a try for the Christmas party this year.  I don't think I will be making a ton of these.  They are just ok in my opinion.  Definitely a different taste to them.  They are also very time consuming and tedious to make which in my opinion means they need to have an amazing result to justify doing.  I kept mine simple this time and just did vanilla macaron shell and vanilla butter cream frosting.  Maybe different flavors would taste better?
But needless to say, everyone can give these puppies a try tonight and decide for themselves if they like them!
Recipe and step by step directions are available at Kevin and Amanda.  She does a great job of walking you through the process!

Chocolate Pretzels


This recipe was super easy to do and much quicker than dipping individual pretzels.  And I think they still look very festive.  I will be doing this one again for sure!  I might use all hugs next time because I think I like the way they look the best.

Ingredients:
1 bag Hershey Kisses
1 bag Hershey Hugs
1 bag plain M&M's
1 bag Pretzel Snaps
Parchment Paper

Directions:
Preheat oven to 170.  Line cookie sheets with parchment paper.  Lay the pretzel snaps out on the cookie sheets and place the hugs and kisses on top of them.  Put the pans in the oven for 5-10 minutes depending on how hot your oven cooks.  The hugs will cook quicker than the kisses so do them on their own pan.  When the kisses and hugs still have their shape but are easy to push down pull the pan out of the oven and quickly place an M&M on top of each.  Place in the fridge for 10 minutes to let them set.

Original recipe came from Disney Family Fun.